Build Your Personal Website for Just €25 a Year: A Step-by-Step Guide
1. Introduction
Embarking on the journey of maintaining a personal website has been a self-taught adventure for me. While there are certainly more efficient and professional ways to approach this project, I’ve found a method that works well through my own learning and experience.
From the beginning, I faced a choice: should I buy a physical server (NAS) or go with a cloud server? In the end, I chose the cloud server. It’s important to keep in mind that anything public on the WAN is vulnerable to cyberattacks. Setting up a strong firewall to protect your home LAN from hacks can really drive up the costs. Because of this, a cloud server, with its built-in security features, turned out to be the more practical and budget-friendly option for maintaining my personal website.
This project also requires knowledge in server administration and web development. Understanding how to configure servers, manage security settings, and develop a functional and attractive website are essential skills to ensure your website runs smoothly and remains secure.
2. Rent a VPS
I’ve decided to place this step before developing the website because it’s essential to have a real estimate of the monthly/annual costs involved in this project. It’s important to design a basic structure that allows for updates and maintenance tasks without service interruptions. Additionally, having prior agility with the server, resource management, and the operating system is crucial.
Several services like AWS and Azure were considered for hosting the website. However, the minimum resources required to rent a VPS from these providers are excessive for the actual usage the website will have. Therefore, I opted for Ionos’ basic plan, which costs €1 (+21 cents VAT) and includes a firewall and a free operating system (Ubuntu Server).

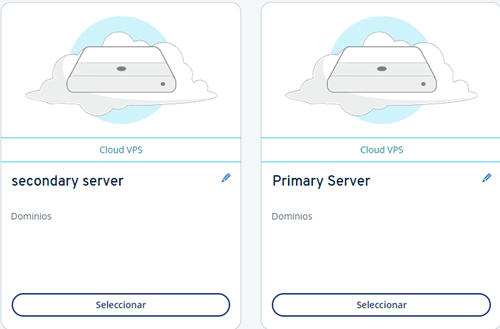
Given the above, I decided to rent two servers, which I refer to as the “primary server” and the “secondary server.” During periods when the server is running smoothly and does not require maintenance or content updates, the secondary server (identical to the primary) will remain powered off.
However, if the primary server becomes unavailable, the secondary server will take over the role and assume the entire load.

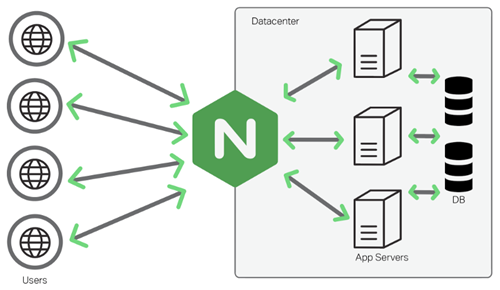
P.S. In an ideal scenario, it would be beneficial to have a third server acting as a load balancer. Configuring a bash script for this server could ensure constant monitoring of the HTML content integrity, detect if the primary server is down, and even balance the load by enabling both servers. However, I have decided against this setup as the website is not expected to have high traffic or usage. The added complexity and cost of maintaining a third server for load balancing would not be justified for the anticipated needs of the site.
3. Build your webpage
To be honest, the practical second step of this project was to develop the website on localhost. However, for the sake of explanation, I find it more useful to place this section as the third step.
Initially, I attempted to develop the website on my own using Node.js. Unfortunately, the result was a mess (I’m not very good with aesthetics). Following the recommendation of two colleagues who are knowledgeable in this area, I decided to use a free template. I then edited this template to match the structure and aesthetics that best suited my needs.
As I mentioned in the introduction, having knowledge in web development is essential. Using templates does not exempt you from this requirement, as you still need to know which parts of the code you can modify and which you should not.
You can access many free templates from this link: https://astro.build/themes/.
Special thanks to “manuelernestog,” the developer of the template I used.
4. Configure Nginx
Nginx is a high-performance web server and reverse proxy server. It is widely used for hosting websites due to its ability to handle a large number of concurrent connections with low memory usage. Nginx is particularly useful for serving static content, load balancing, and handling SSL/TLS encryption.
In this project, Nginx is the service used for hosting the website. At this point, I won’t go into precise details or provide the exact configuration to avoid leaking information that could be useful to an attacker. However, it’s crucial to properly configure Nginx to ensure that users from the WAN cannot access private resources. Additionally, Nginx must be correctly set up to point to the web code, ensuring that all the website content is served correctly.
Properly setting up Nginx involves configuring server blocks, managing security settings, and setting up appropriate file permissions. Ensuring these configurations are correctly implemented is essential for the smooth and secure operation of your website.

5. Register a domain
Every website today requires a secure certificate, and to achieve this, as well as to offer a “normal” web presence, you need a unique name to identify it – that is, a domain.
In the past, I purchased domains where the configuration was somewhat complicated, requiring the setup of nameservers. However, I recently discovered Squarespace and was pleasantly surprised to find that this comes pre-configured, with only the need to change the records.
In fact, Google recommends purchasing domains through Squarespace, and in my case, the cost of the domain was around 10 euros.
It’s also a good practice to keep the CNAME record for www so that users who are accustomed to typing www.domain.com can still access your site.
I configured the records as follows:

**Link: ** https://www.squarespace.com/
6. Generate certificate
Having a valid certificate is crucial to ensure that browsers and antivirus software do not block your content as potentially malicious.
Initially, I thought deploying a secure certificate recognized by antivirus software would require spending a lot of money. When I saw that generating a certificate from DigiCert would cost 400 euros, it became clear that I needed to find an alternative.
Fortunately, I discovered Let’s Encrypt, which allows you to associate a valid certificate with your website completely free of charge (specifically in the Nginx configuration).
Let’s Encrypt is secure in the eyes of antivirus software because it provides certificates that are trusted by all major browsers and operating systems. This trust is established through a robust validation process and frequent certificate renewals, ensuring your website remains secure and trusted.
Step-by-Step Guide to Generating a Certificate for Nginx:
- sudo apt install certbot python3-certbot-nginx
- sudo certbot —nginx -d yourdomain.com -d www.yourdomain.com
Configure nginx filee to import the new certificate.
P.S.
Before obtaining a certificate, it’s super important to ensure that your Nginx configuration file is correct. You can check the configuration with: nginx -t
7. Ionos Firewall configuration
Based on my experience in server maintenance, it is inevitable that shortly after your server becomes available, you will start receiving attacks of various kinds, especially brute force attacks on the SSH port.
Therefore, my recommendation is that when you are not manipulating the server, only ports 443 (HTTPS) and 80 (HTTP) remain open (with port 80 redirecting to port 443) as shown in the image:

When you need to manipulate the server, you should apply a specific rule indicating your public IP address:

By configuring your firewall in this way, you can enhance the security of your server by limiting access to only the necessary ports and adding an extra layer of protection when performing administrative tasks.
8. Conclusion
f you want to have a website with a single server and a domain that costs 10 euros, you can maintain your website annually for 25 euros.
However, if you opt for a setup with 2 servers, the cost increases to 39.88 euros per year.
Additionally, this simple project serves as an excellent example to demonstrate knowledge in networking, web development, and operating systems. It highlights the practical skills needed to set up and maintain a functional and secure website.